How does one sharpen a knife without damaging the blade? Is there a way to keep the edge sharp for 6 months or even a year? BPS Knives covered every question in this article.
Don`t sharpen a knife «like a razor» if it’s not Hollow Grind
Razor sharpness is for rare occasions, like shaving or capping. Same is true for any «Hollow»-like grind, where the edge is artificially thinned. There is no other edge type better at sharpness than Hollow Grind, however — it comes at cost and is hard to sharpen on a spinning wheel without previous experience.
The sharper the edge — the thinner and more vulnerable to shock it is. Physics — to cut is to break bonds between organic matter, and the smaller the surface, the more force you are able to apply. Therefore, cutting part of the edge is always small.
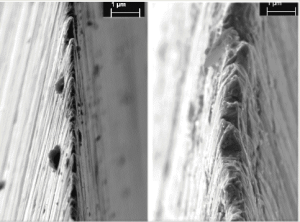
Photo from scienceofsharp.com
If you’re going after sharpness, and Hollow Grind is your choice, then keep in mind that the blade itself would be vulnerable to shock and may break under direct pressure. This is because of Hollow Grind bevels, which are thin in nature and inward-curved, making blade itself thinner;
Here’s an example of incorrect sharpening
Photo from reddit.com
Always consider the grind type and best suitable grinding tool for that, otherwise you’re going to ruin the blade.
Whetstone vs Grinder Knife Sharpening
Sharpening with a Whetstone:
- Ol’, reliable, good for most of the kitchen knives. You’re looking for grits #300 to #350 for regular all-round knife, with fine grits #400 to #1000 reserved for chef’s and prep knives. For the Japanese kitchen knives, oftenly done with hollow and chisel grind, you’re looking for #1000 to #2000 grit whetstones.
- Works well for hunting blades, but will take more time to grind them. So you should apply more force during the sharpening process, while maintaining the same angle. To keep the angle stable, you can use angle-holders or fingers;
- Not to sharpen Hollow or Convex Grinds if you are new to the grinding, since they require applying pressure carefully distributing it on the surface of the edge.
- Best suited for Full Flat Grind blade types, or your typical kitchen knife, since bevels are usually of the same edge angle, which in turn gives more surface to «feel» during grinding, resulting in an easier control.
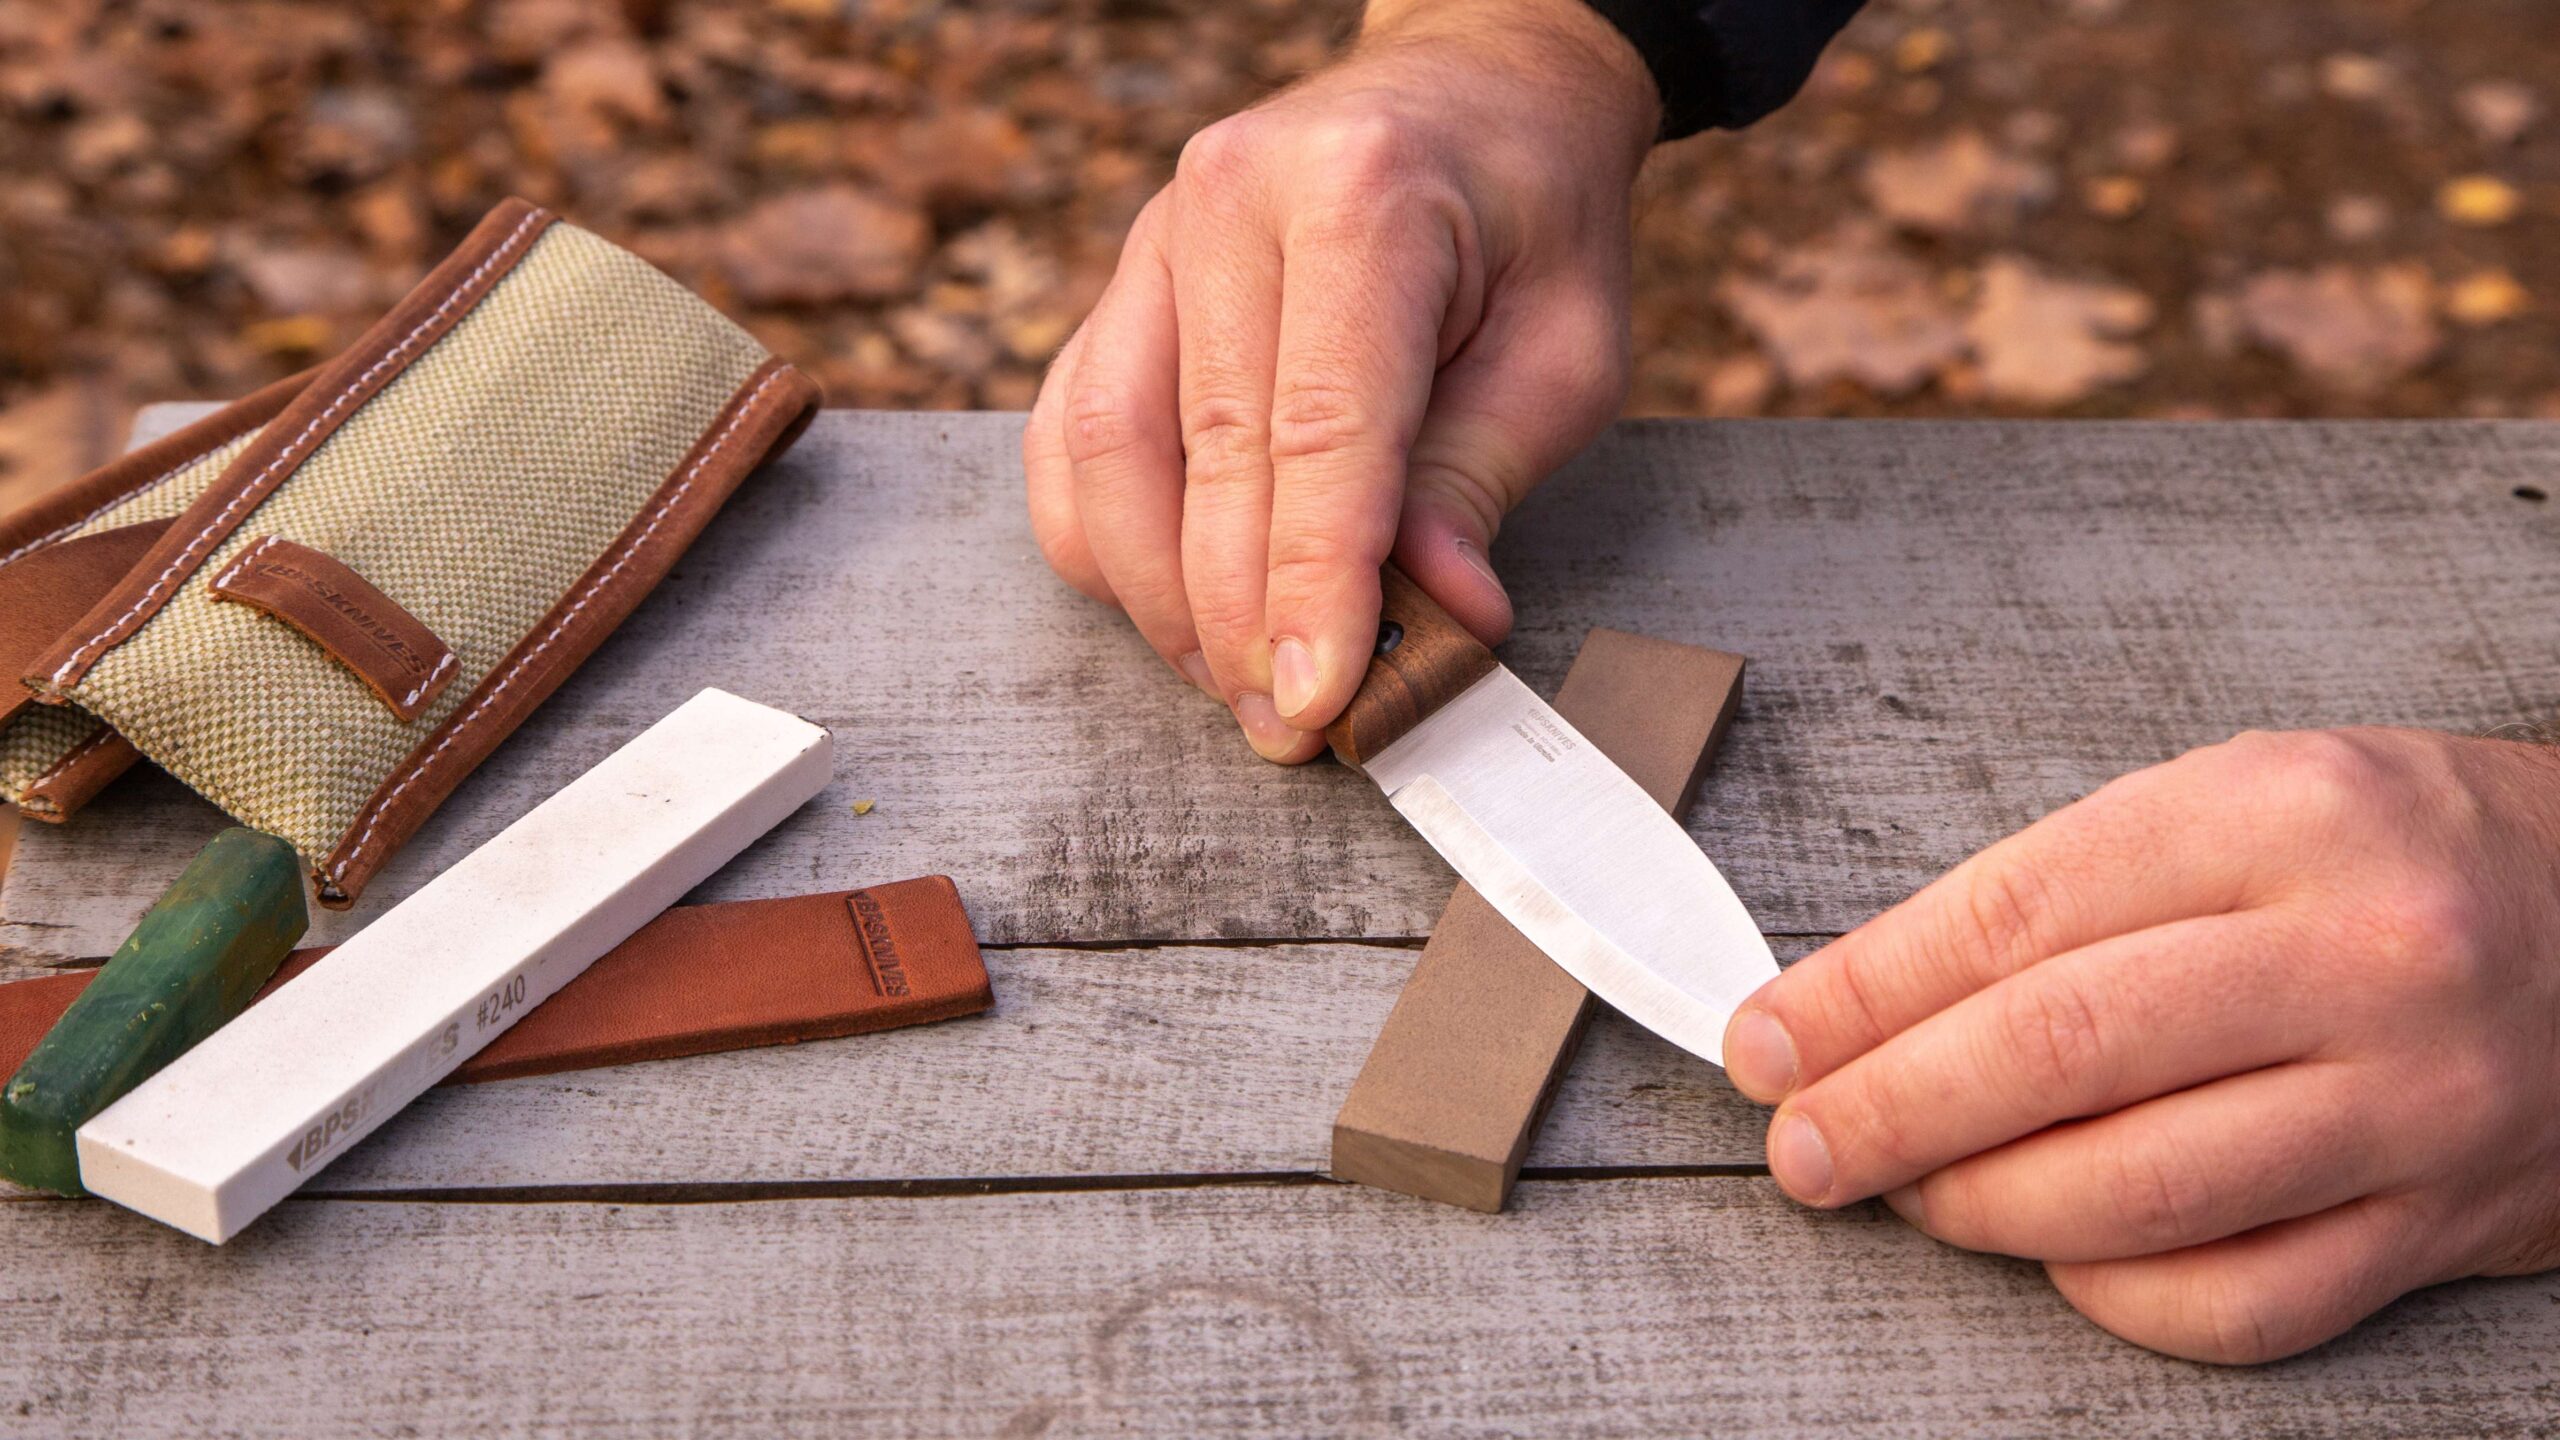
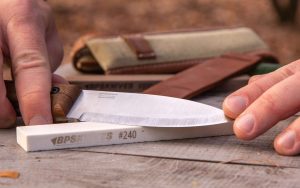
Discover the art of knife sharpening with BPS Knives! Explore our video tutorial on sharpening and polishing knives using a sharpening stone – “Taking care of a blade: how to sharpen a knife.” This guide is tailored for micro bevel and scandi knives, providing valuable insights into achieving the perfect edge.
The featured sharpening set in video can be found here: Sharpening Set – 2pcs. This set includes a 240-grit sharpening stone, an 800-grit sharpening stone, a Leather strop, and 5-3 micron compounds. Elevate your knife care routine with BPS Knives!
Sharpening with an automated or electrically powered Grinder:
- Best suited for skilled artisans and thick blade types. During sharpening you need to control the blade in order to avoid damaging it with vibrations and applied force combined. To keep the angle stable, you should consider using holders with clam fixators.
- Not for thin blades, requires good grip to operate. Grinding belt, or wheelstone, can chip a lot of material at once, so consider applying less force for thinner blades.
- Can be used to sharpen Sabre and Chisel grind types. Because those two blade grind types require using thick blade spine and have a lot of material behind the edge.
- Be careful with angle grinder and try practicing beforehand on butter knives or the most unused blade.
Sharpening Stone Grit and their proper uses
There are 10 levels of different whetstone grit types, each for a different application. Take a note, that for each grit level there are corresponding use-case, such as finishing, polishing and machining. Certain grits are more suited for material removal, while others are best used to sharpen the blade.
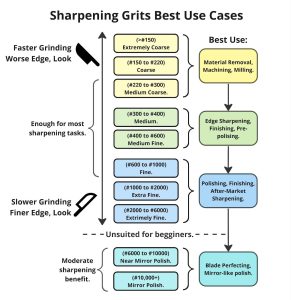
Whetstone and Grinder Grit Types Explained
“Blade Repair” grits:
- Extremely Coarse: under #150 grits. Fastest material removal, with coarse surface this grit level leaves visible «valleys» in the blade, and is not suited to sharpen fine cutlery.
- Coarse: #150 to #220 grits. Fast material removal, but at the cost of leaving visible scratches at the surface of the blade. Commonly used to wheat away a few millimeters of surface to create cutting edge. This grit isn’t suited for everyday sharpening, since it has a high risk of damaging or chipping fine cutlery.
“Fine Sharpening” grits:
- Medium Coarse: #220 to #300. Mostly suited to sharpen dull tools and to recover the cutting edge of a knife. Scratches, left by this grit level, still visible to keen eyes, will be unnoticed by most people from a distance.
- Medium: #300 to #400. Level-up from Coarse Grit, with good balance between material removal rate and the size of surface scratches. This grit range is suited as an intermediate stage before using finer levels.
- Medium Fine: #400 to #600. This grit range is recommended as a final stage of sharpening for most of the knives. With slower sharpening rate, this grit allows the blade to appear much smoother, masking most of the scratches.
“Extra Sharp & Polished” grits:
- Fine: #600 to #1000. Provides sharpness level equivalent to most of the factory-made edges on knives, blades and tools. Tradeoff is modest sharpening speed, which is rewarded by a gleamy, frosted look on the edge.
- Extra Fine: #1000 to #2000. Notable slow rate of sharpening due to finer grit. Works good for polishing stages, but will take time to sharpen a knife. This is a slow, but rewarding grit, able to sharpen the edge better than such high-end factory-made blades, given the patience.
4 Simple Steps to Sharpen a Knife with a Grinder
We’re taking into account that common belt grinder type is used for this operation.
- Sharpening with a bench grinder. To sharpen a knife with a straight blade, apply gentle downward pressure while pushing the edge forward. Brush the knife across the surface to remove rough edges, holding the blade flat on the wheel.
- Clean the blade & Cover it in Oil. You don’t want dirt, particles, dust or sand sitting on a knife during grinding. Oil is required to protect the blade from heating and provide more friction during sharpening.
- Hold the blade under a 45 degree angle to the grinding surface. To achieve the best possible sharpness, it is vital to keep the same grinding angle across the whole surface of the edge.
- Move from the base to the tip, while keeping the same direction of the grinding for the edge. Ideally, you’re looking for a symmetrical edge.
- Repeat this process 2 to 3 times for a sharp-edged knife.
Sharpness testing. Cut the paper straight, the easier blade goes — sharper the blade.